I live using dots for nail art designs as they are just so easy to apply and you can’t really go wrong it. Also, there are pretty much endless possibilities of what you can create with them.
If you don’t have a dotting tool yet, you can still make these cute designs by using a toothpick or a bobby pin so nothing ca stop you 😉
I’ve just got this lovely red creme colour recently so of course I had to start using it straight away! 😅 I thought that with some white, it would be the perfect summer/spring colour I need right now in this cold English weather 😅
- So first, apply a thin layer of base coat to all your nails and cure it under your lamp. Try to apply it as thinly as possible to avoid lifting later on.

- Apply the first thin layer of colour to your nails. I’ve used red on the index and little finger, and white on the rest of them. Cure it.

- Apply a second layer of colour to all your nails and cure it under the lamp. (Try to apply it very thinly and if needed rather add an extra layer than to apply it too thickly as it could cause wrinkling and lifting later. )

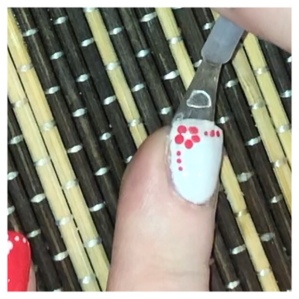
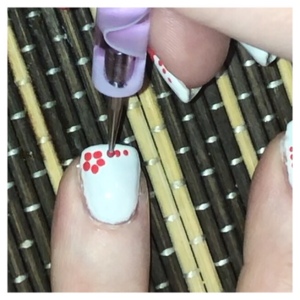
- Using a dotting tool (or bobby pin), apply 5 dots in a circle to create the petals of a flower. (I flash cured them for 5-10 seconds after applying it to each nails to make sure that the dots won’t spread in the meantime.) when applied to all nails, cure it completely

- Using a smaller dotting tool (or toothpick) apply 3 little dots to each side of the flower to add a “frame” to it and also flash cure it from time to time. When applied to all nails, cure it fully under your lamp
- To finish off the design, apply a thin layer of top coat to all your nails and cure it under your lamp.