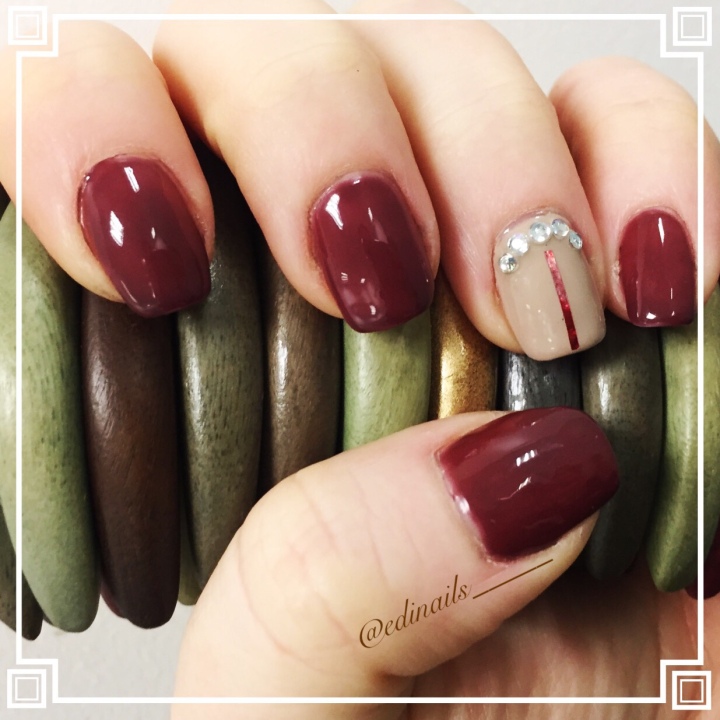
As we just had some extreme weather last week I was struggling to get to work towards the end and found myself with some unexpected free time at home. So what else could I do then than my nails, right?
But also this miserable weather made my mood a bit more wintery again so I have gone for some darker shades. Well, I say miserable but I have also used some gems that would give that extra sparkle a girl would need 😉
Overall I think that this design looks super gorgeous but it’s also quite easy to make. Don’t get confused with that straight line in the ring finger, I used some coloured tapes for that which I bought from eBay for £1 😊
- So the first step is always prepping the nails. Part of this I always use a fine buffer to just remove the shine of my nails and after that I just quickly cleanse them. Cleansing is super important as the gel wouldn’t stick to an oily surface as good and you may experience some lifting without this step.
- When you’re nails are prepped, it’s time for the base coat. Be super careful with the base coat as your colour may shrink or wrinkle if the base coat was applied too thickly.

- The next step is too apply the first coat. I applied a thin coat of a nude polish to my ring finger and then cured this layer before moving on to the other nails as I thought that I might need an extra layer from this polish.

- Once the first coat of the nude is cured, I applied a second coat of the nude to the ring finger and applied the first coat of red to the rest and cured them under my LED lamp.


- The next step is to add a second layer of red and a third layer of nude. I used 3 layers this time as I wasn’t happy with the coverage after just two coats. It depends on the brand and shade you are using, sometimes 2 coats just doesn’t give you that perfect depth of a colour somehow

 Also, before curing my nails, I added the gems to the ring finger. The reason why I add them at this stage is that I found them sticking into my mani better this way as I really don’t want to loose them too early 🙂 once you’re happy with the gems, cure them.

- When the nude looks good, it’s time to add the tape. I usually just cut a longer piece off and stick that one to my nail and once I’m happy with how it looks, I just cut off the excess bit with either scissors or nail clippers. As you can see, my hands are super shaky so if I managed to stick this on fairly well then I’m sure that anyone would be able to do the same 🙂
 I have also added another thin coat of red to the other nails as I wasn’t happy with the coverage yet.
 - And the last step we have left is the top coat. When adding a top coat to the gems, make sure that you cover them completely as it’s easy to miss off the side closer to the nail bed, but since you have some nude gel there, it would remain sticky without the top coat.

Once your top coat is cured and cleansed, add some cuticle oil to your cuticles to keep your mani nice for longer.
Although the colours I have chosen are more of winter colours in this combination, I can definitely see this becoming a summer mani with some brighter shades so I would definitely give this another go during summer time 😉

Also check my Youtube channel for a full video on how this mani is done here
